How To View Insights In Creator Studio
October 2023 Update: Creator Studio tools have moved. You still have access to many of the same features to create, manage and monetize your content on Facebook through Professional dashboard, and you can access all of your content across Facebook and Instagram on Meta Business Suite.
In this blog article, we will give you a step-by-step guide for viewing your Facebook and Instagram insights in Creator Studio.
If you are unfamiliar with Creator Studio, read our blog post about what it is and what it offers here.
Knowing your social media analytics can help to inform how your social media marketing strategy is working. Through Creator Studio, you can also manage your Facebook pages and Instagram accounts. It is a great social media management tool for publishing content and viewing social media insights.
Creator Studio is available on desktop and mobile devices.
Anyone logged in to a Facebook Page can use Creator Studio, regardless of their role (though some features are only available to certain roles).
To use Creator Studio on mobile, download the Creator Studio app for iOS or Android.
Step 1: Log into Creator Studio
To get started with the process of viewing insights on desktop, simply go to business.facebook.com/creatorstudio while signed in to your Facebook account.
Step 2: Go to Insights on the left side menu
The Insights section is where you can see all of the details about your Facebook performance.
The Insights section in Creator studio is broken down into 4 major categories:
Pages
Videos
Stories
Instant Articles
We are going to cover the “Pages” category in this article.
When you first click "Insights," Creator Studio will open the Video Insights.
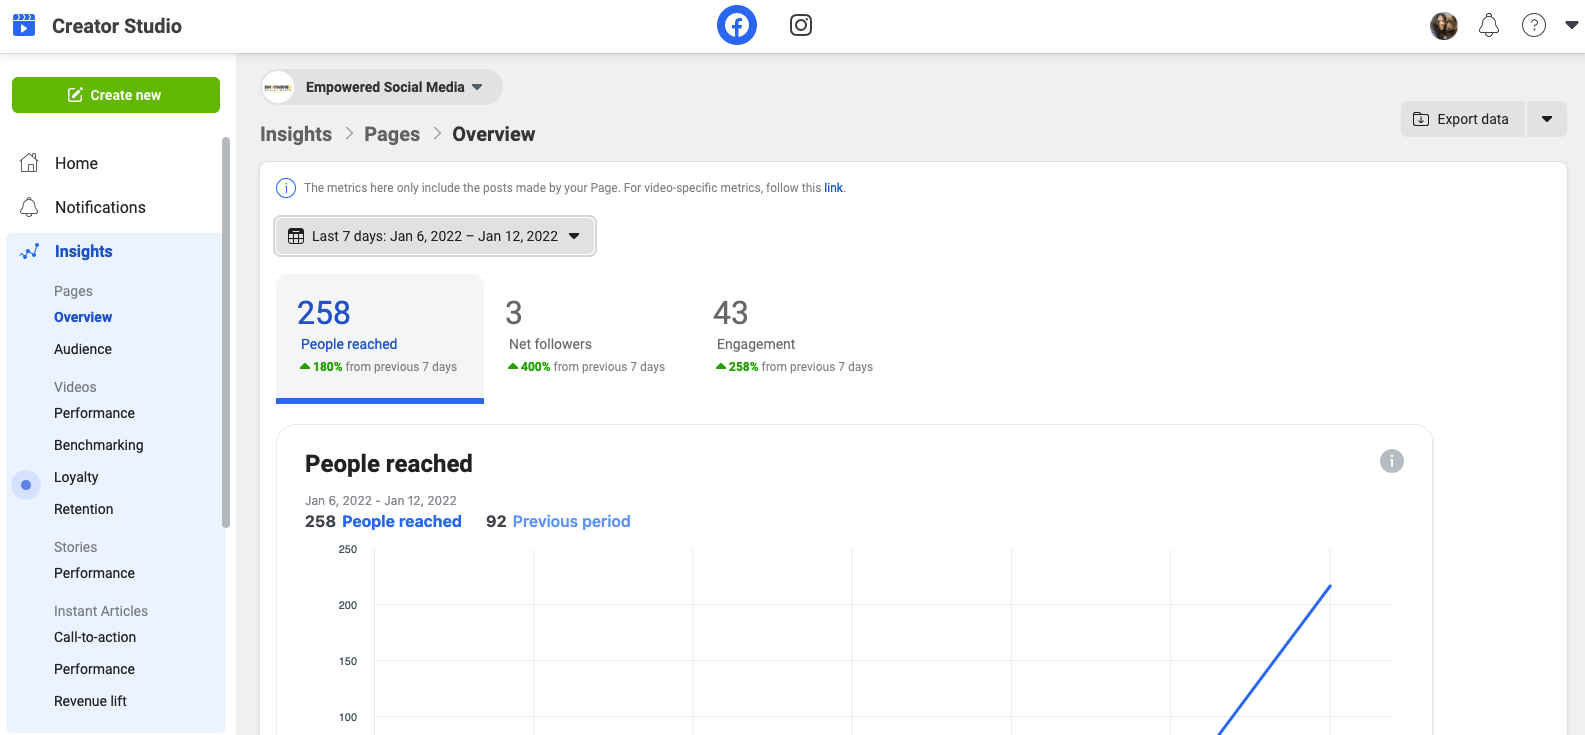
Step 3: Click “Overview” on the left side to view your general Insights.
It will automatically show you your page performance over the last 7 days, but you can select a different time period if you are interested in seeing other times. Just click where it says “Last 7 Days” and select a new period.
Step 4: Click “Audience” on the left side to view your audience insights.
Step 5: Click the “Total Followers” tab.
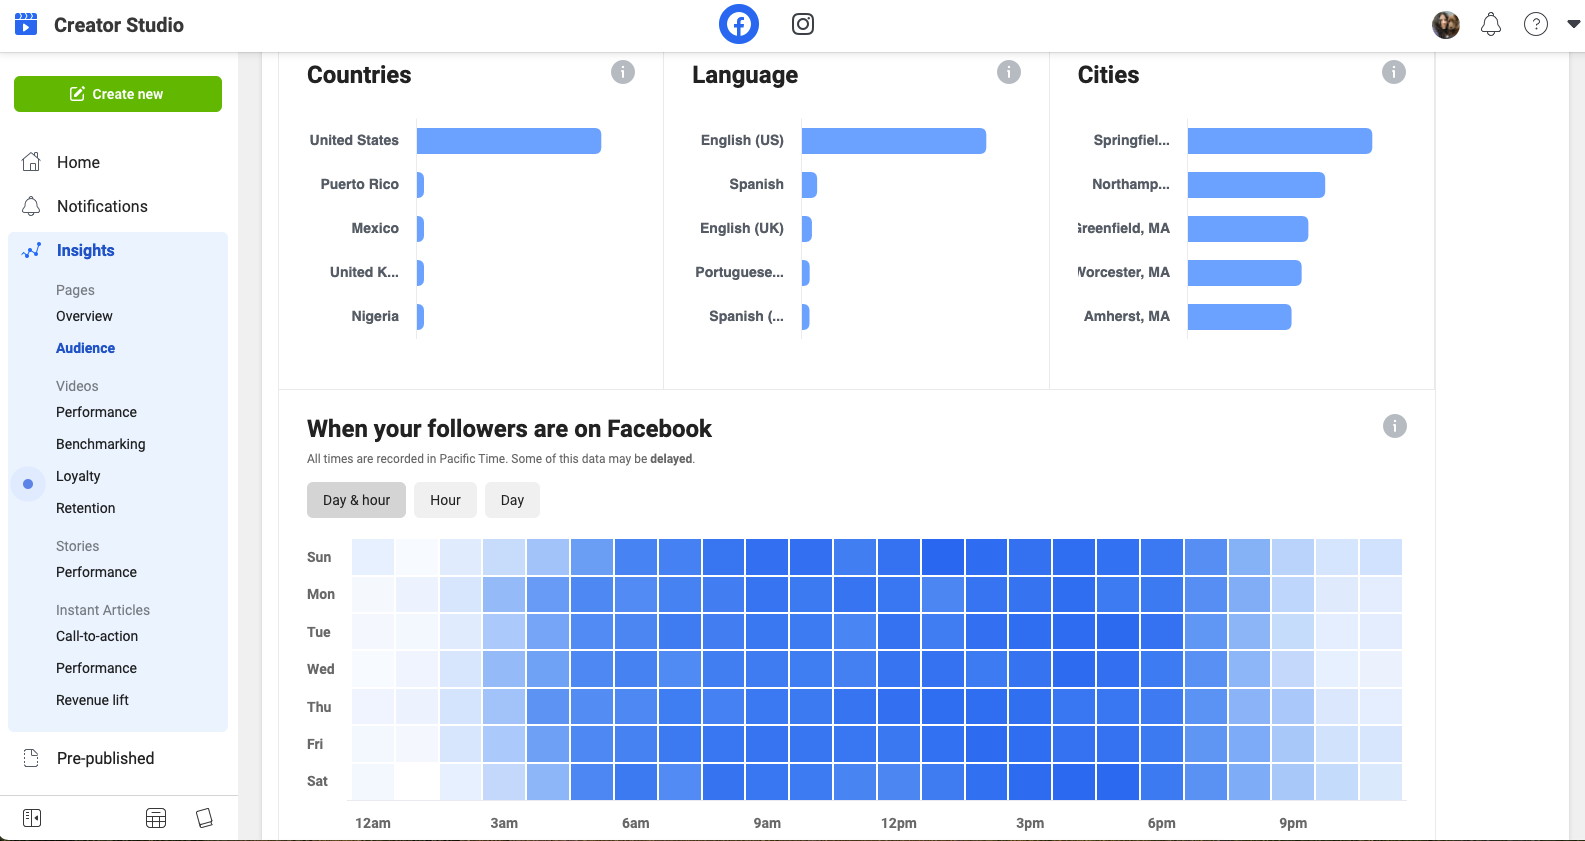
Here you will see all of your Facebook audience insights. At the top, you can see the age and gender of your total audience. This can help you to know who you are speaking to when you are creating content and curate it for that audience. Below that, you can find insights for country, location, and when your audience is most active on Facebook.
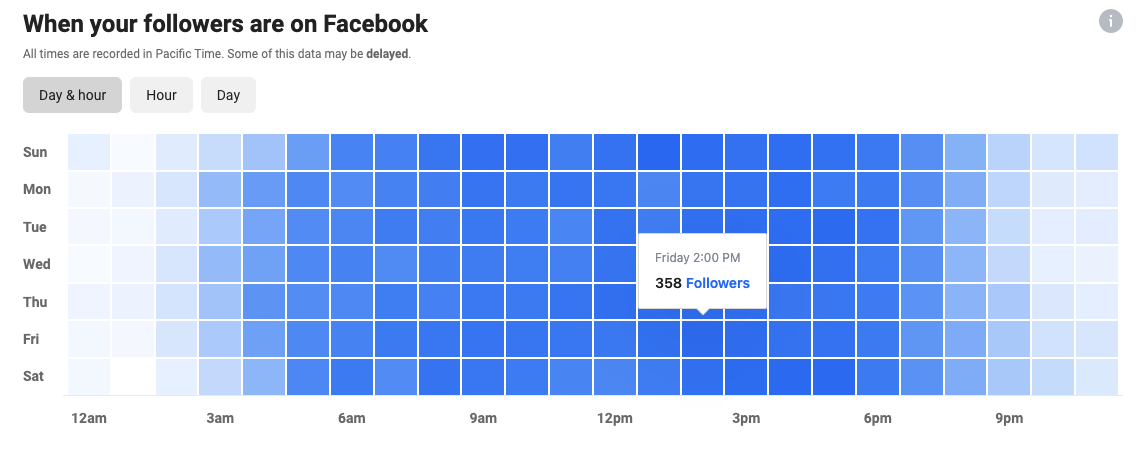
Knowing when your followers are on Facebook is a very useful metric because it can inform when the best time to post for peak engagement is. You can toggle this chart to show the best day, hour, or both. On the day and hour chart, the darkest blue colors show the best times and days for you to post content.
It’s important to note which time zone it says at the top. For example, it may say Pacific Time so if you are in a different time zone, you may have to do a quick conversion to know the time in your time zone.
At the bottom of this page, there is another audience insight chart, where you can break down your total audience into various demographics, such as city, age, and gender. This is just another way to get to know who is following you so you can gear your content towards those people.
You can also click “export data” at the top right if you want to export any of these insights as a .csv file on your computer.
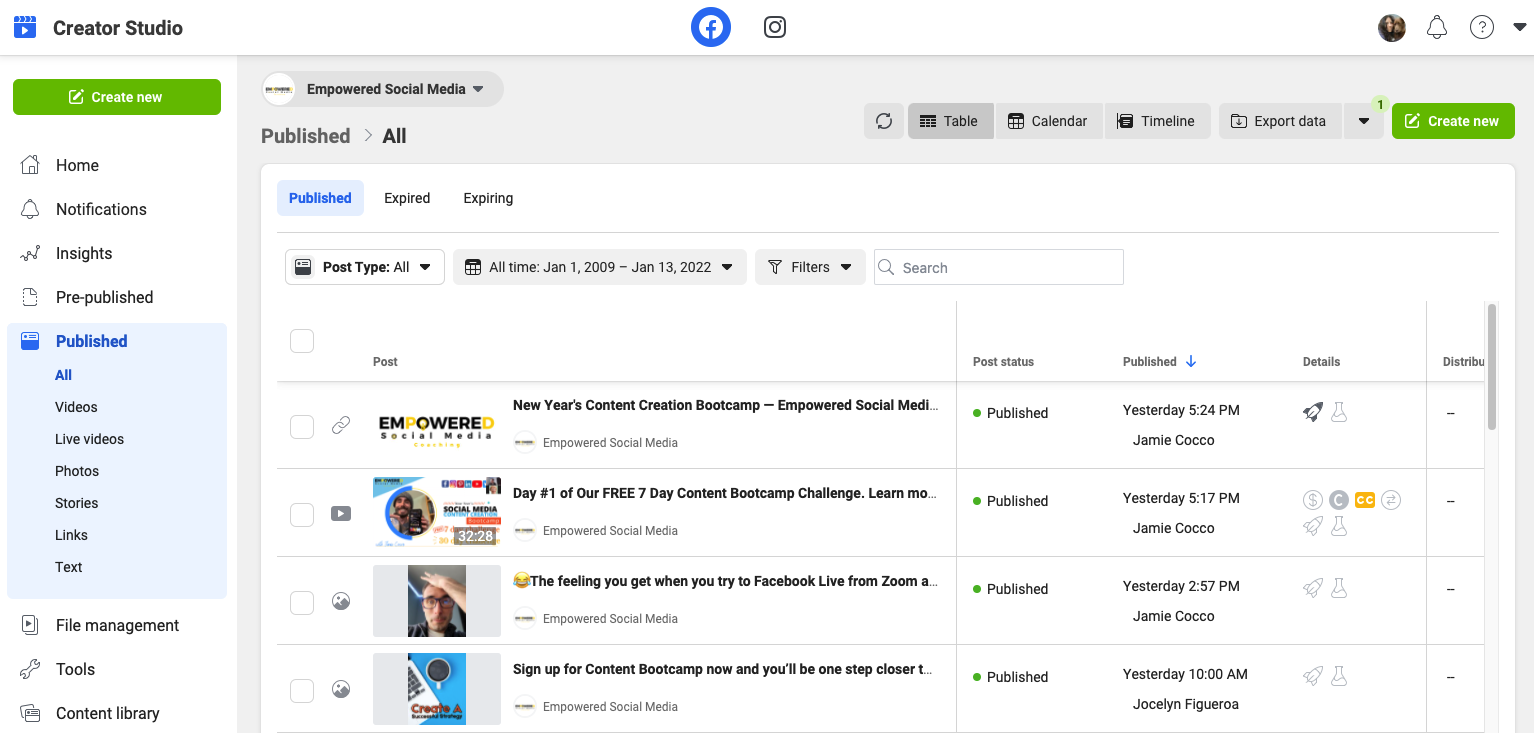
The last section on the Facebook side of Creator Studio that we want to note is the “Published” tab.
Step 6: Click “Published” on the left
Here you can see how your individual posts have performed. Please note that you can filter the results by time period and you can scroll to the right to see more insights about each post.
Learning which type of contents performs well on your page can help inform your future social media marketing strategy. What was it about a well-performing post that you think made it perform well? Did you tap into a certain emotion? Did you use a video instead of a photo? Did you add hashtags? Analyze your posts and experiment with all these different things to discover what content your audience loves.
Step 7: Switch To Instagram By Clicking The Instagram Icon At The Top
If your Instagram account is not connected, you will need to click “Connect Your Account” and log in to Instagram first.
Once you are logged in, you will be taken to a Content Library of your Instagram posts.
You can select a category at the top or change the time period to filter the results. For example, you could click “stories” to just see your Instagram stories.
Just like with Facebook, you can see which type of content is performing well on your page and use that information to create more content that your followers will engage with.
Step 8: Click “Insights” on the left.
The Instagram insights are not as detailed as the Facebook insights, but there are some useful insights in this section. The “Activity” tab will open and here you will see various actions that have been taken from your Instagram account, such as website visits and profile visits.
Below that, you can also see your reach (the number of unique accounts that have seen any of your posts) over the past 7 days and your impressions (the total estimated number of times all of your posts have been seen).
Step 9: Click “Audience” on the left side of the screen.
Similar to Facebook, you can see the age and gender of your followers on Instagram.
Below that, you can also see insights for country, city, and peak times to post.
We hope this Creator Studio insights guide helps you to view your insights and start keeping track of what type of content works best for your audience.
Looking to take the next step in your social media management? Our team can help you with that! From creating custom content to crafting compelling messages and scheduling posts, we're here for whatever you need. Click the button below to see our social media management packages or contact us today- there's never been a better time than now!
